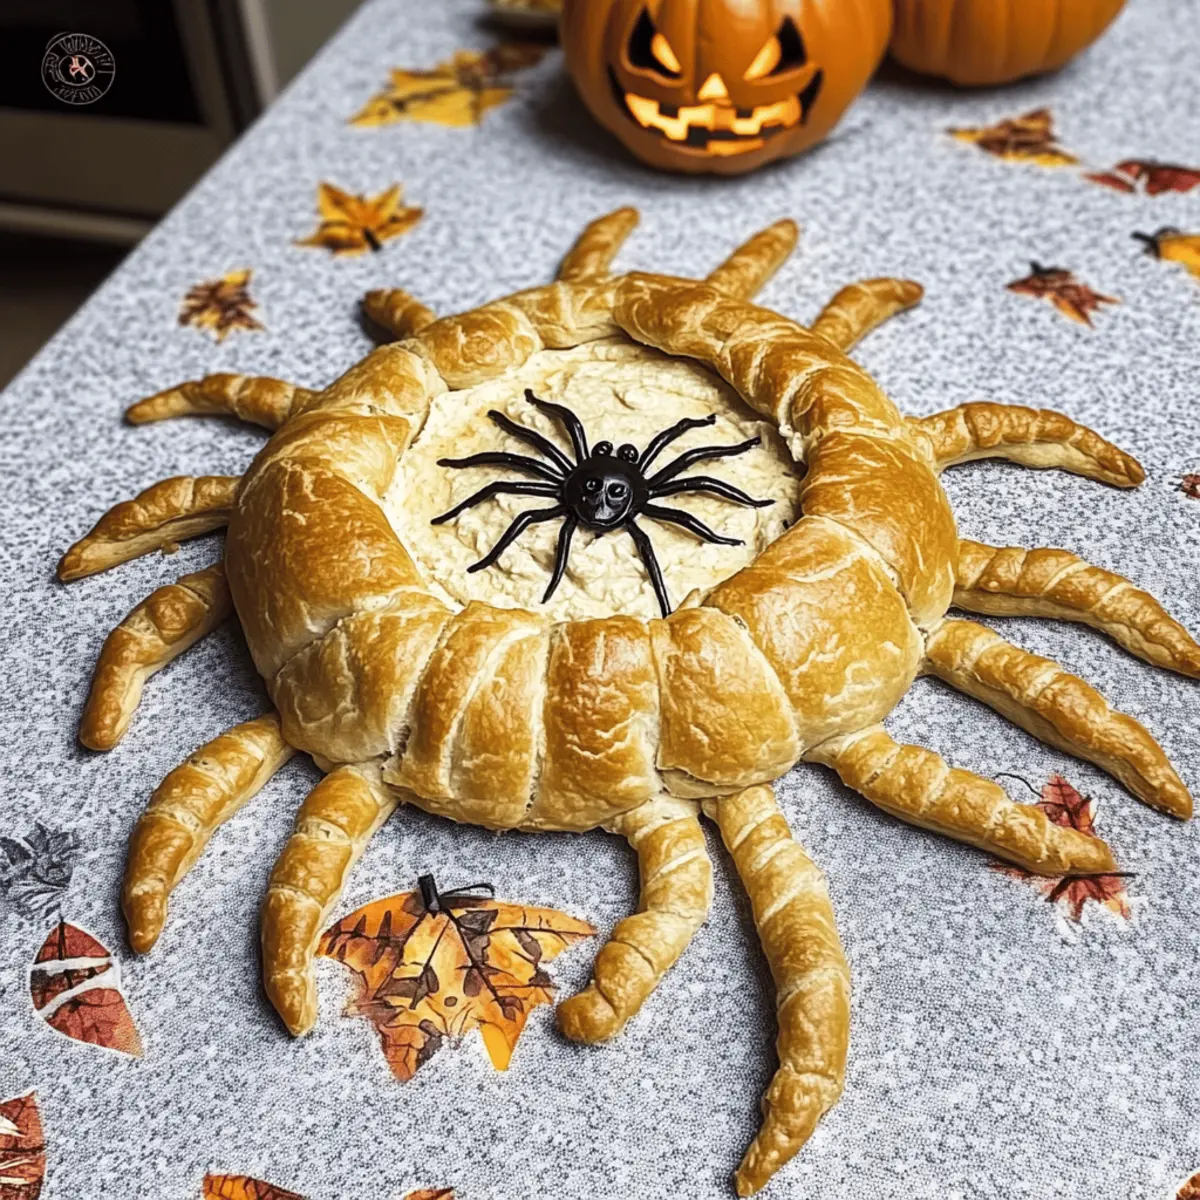
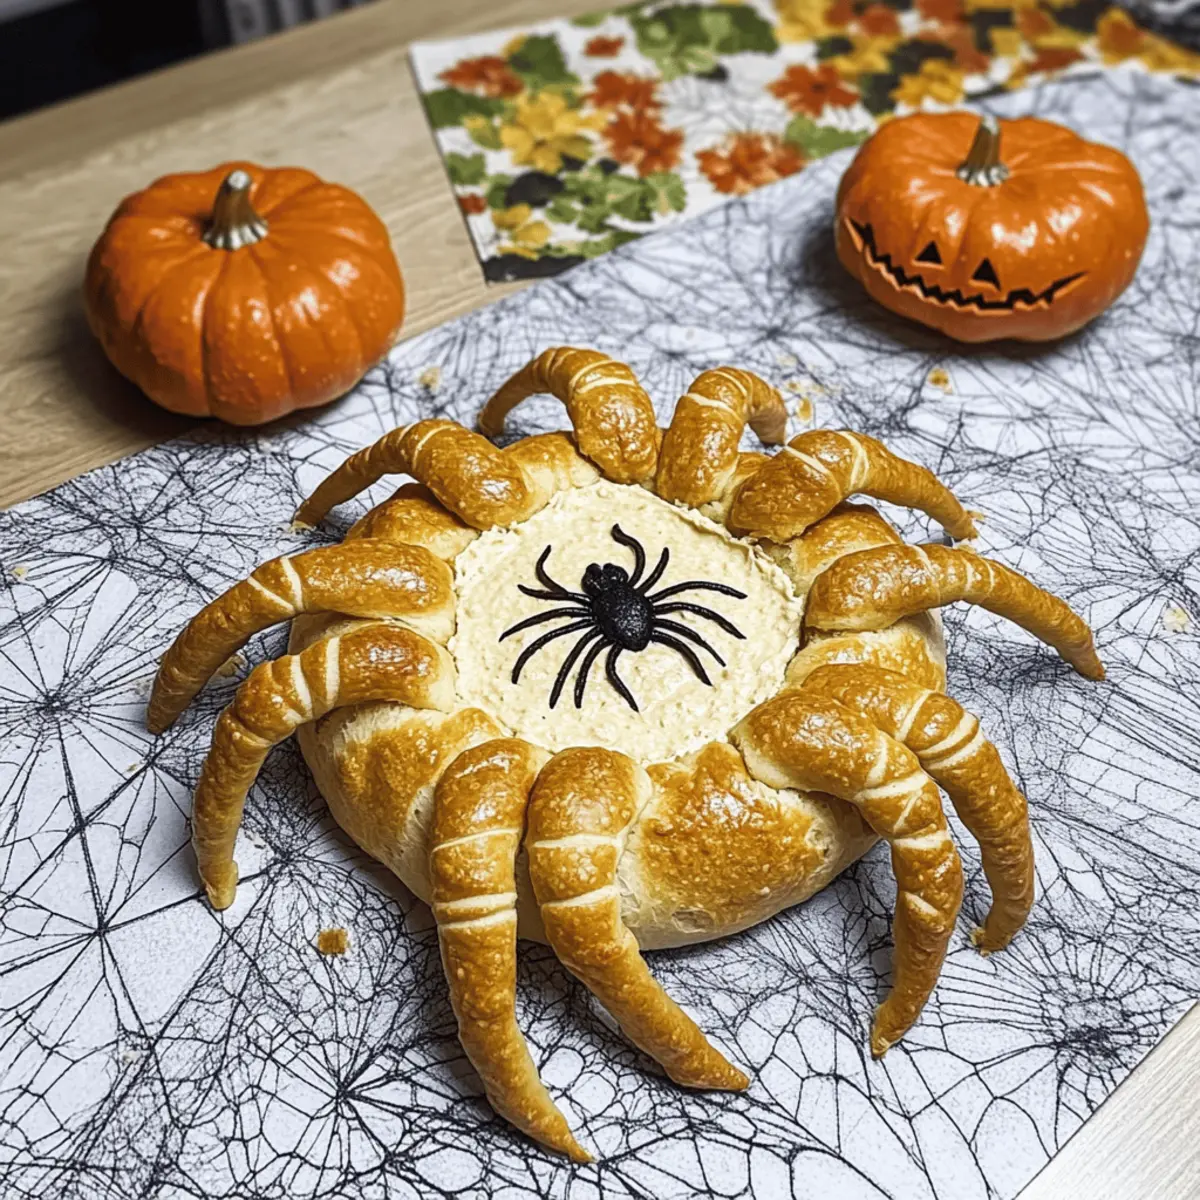
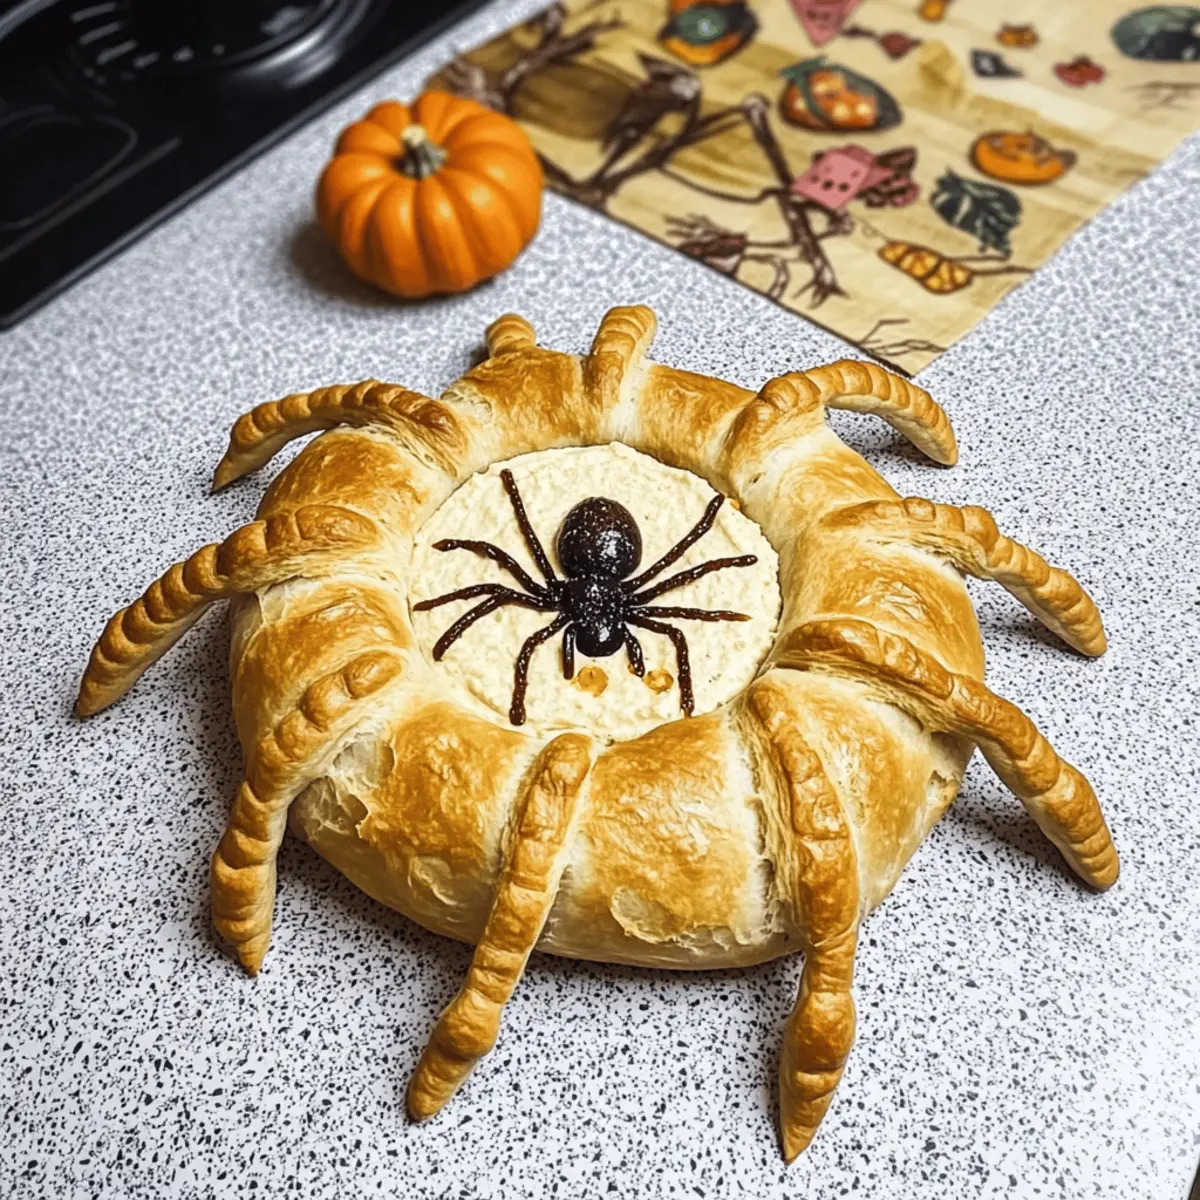
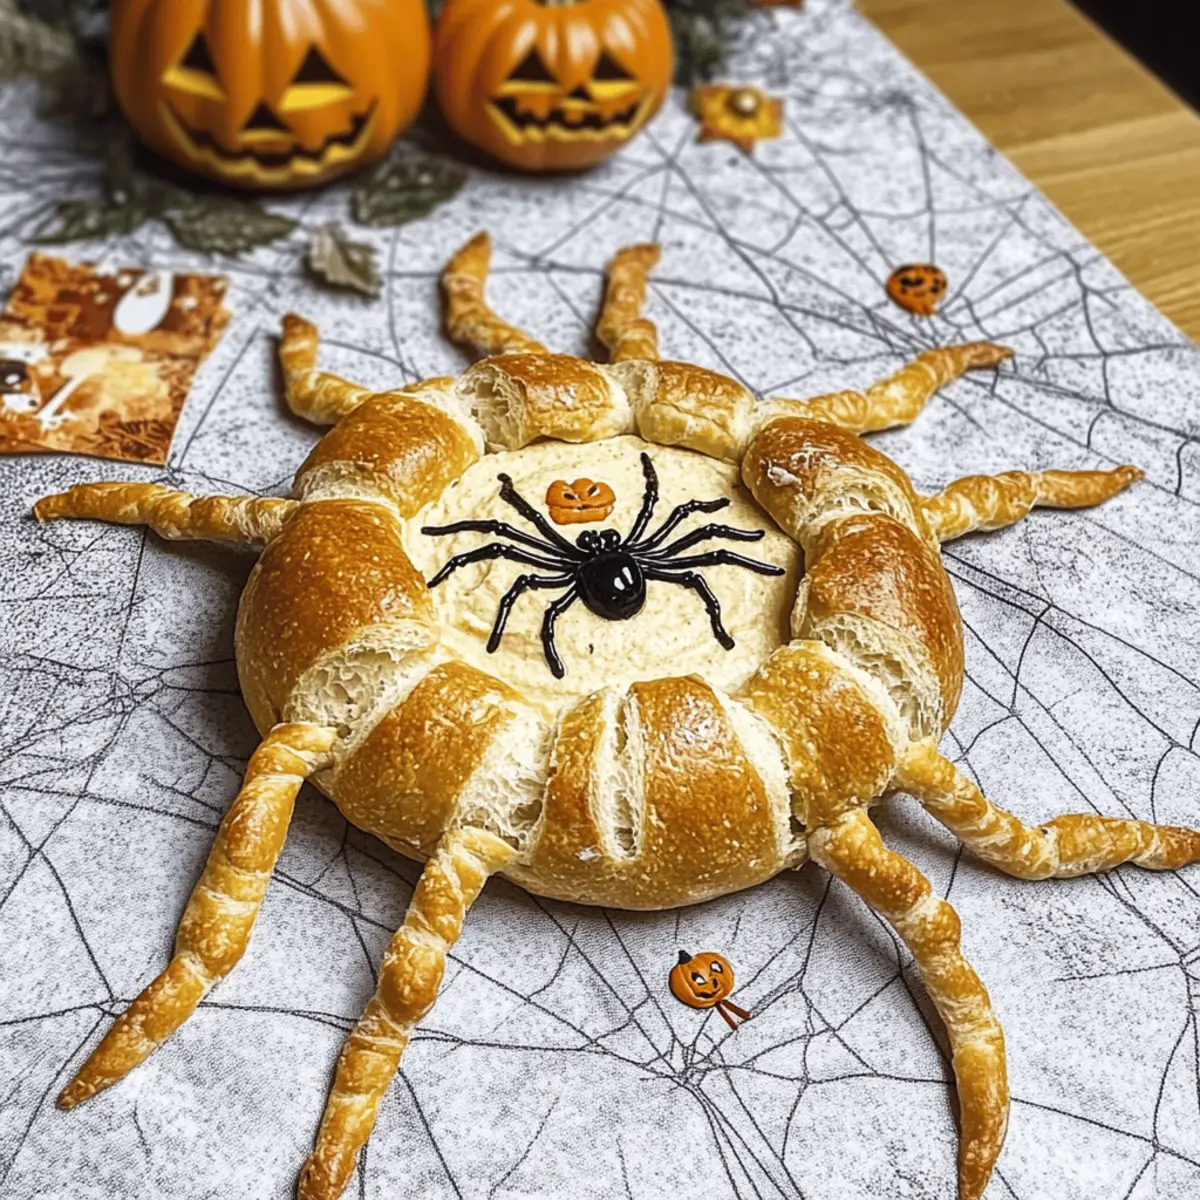
As the Halloween season creeps in, I find myself in a delightful mini crisis: how do I make my gathering memorable amidst the usual candy corns and spooky decorations? Enter the Spooktacular Halloween Spider Bread Bowl! This ingenious creation not only serves as a show-stopping centerpiece for your table but is also incredibly easy to whip up from scratch. Imagine a warm, golden-brown bread shaped like a spider, perfect for cradling your favorite dips. Plus, it’s a fantastic way to get the kids involved in the kitchen, making it an engaging activity that everyone will remember. Whether you’re hosting a party or simply looking to add fun to family dinner, this Halloween Spider Bread is bound to be a hit. Curious about how to bring this spooky delight to life? Let’s dive in!

Why is Halloween Spider Bread a Must-Try?
Creative Fun: This Halloween Spider Bread Bowl transforms a simple dip setup into an interactive experience that kids and adults alike will love.
Easy to Make: Even beginner bakers can get in on the fun, thanks to the straightforward steps that ensure success every time.
Versatile Dish: Perfect for any dip, from creamy spinach artichoke to zesty salsa. Explore delicious options that pair beautifully with this festive bread.
Showstopper Centerpiece: The adorable spider shape is sure to ignite conversations and spark joy at any Halloween gathering.
Family Bonding: Get everyone involved in the kitchen! Making this bread is a fun way to spark creativity and teamwork while cooking together.
Serve it alongside Cornbread Breakfast Casserole or whip up a delightful spread!
Halloween Spider Bread Ingredients
• Create your spooky masterpiece with these essential ingredients!
For the Dough
- Bread Flour – Provides structure; substitute with all-purpose flour if necessary.
- Water – Activates yeast and binds the dough together.
- Yeast – The leavening agent that ensures the bread rises; use instant yeast for quicker results.
- Salt – Enhances the flavor profile; do not omit, but can be reduced for lower sodium diets.
- Sugar – Adds a hint of sweetness to balance flavors; honey or maple syrup can be great alternatives.
- Egg – Contributes richness and aids in browning the crust; replace with a flax egg for a vegan option.
- Cooking Spray – Prevents sticking, but you can use parchment paper for easier transfer.
For the Decoration
- Coffee Beans/Peppercorns – Serve as the eyes of your Halloween spider, adding a whimsical touch to the bread.
Dive into the fun of baking and create your very own Halloween Spider Bread—your guests will be thrilled!
Step‑by‑Step Instructions for Halloween Spider Bread
Step 1: Prepare Dough
In a large mixing bowl, combine 4 cups of bread flour, 1 and 1/2 cups of warm water, 2 teaspoons of instant yeast, 2 tablespoons of sugar, and 2 teaspoons of salt. Add 1 beaten egg for richness. Mix until a shaggy dough forms, then transfer to a floured surface and knead for about 10 minutes. The dough should be smooth and elastic—this will create the perfect base for your Halloween Spider Bread.
Step 2: Shape Spiders
Once your dough is ready, divide it into one large portion for the spider body and several smaller pieces for the legs. Shape the larger dough into a round ball, then flatten slightly from the top to create a body. For the legs, roll the smaller dough pieces into long, slender forms. Attach them securely to the spider body, ensuring it resembles a spooky arachnid ready for Halloween festivities.
Step 3: Proofing
Place your shaped spider dough on parchment-lined baking sheets. Lightly spray the dough with cooking spray to prevent sticking and cover with plastic wrap. Let the dough rise in a warm place for 30 to 45 minutes, or until it has doubled in size. You’ll know it’s ready when the dough has puffed up, filling the kitchen with an inviting aroma and a hint of Halloween magic.
Step 4: Preheat Oven
While the dough is proofing, preheat your oven to 400°F (200°C). This temperature is perfect for achieving a perfectly golden crust on your Halloween Spider Bread. Make sure your oven is fully heated, so the bread bakes evenly, allowing the delicious fluffy interior to develop alongside that eye-catching exterior.
Step 5: Add Eyes
Before baking, create some creepy charm by pressing coffee beans or whole peppercorns into the dough for the spider’s eyes. Position them slightly above the body, ensuring they are secure but not too deep. This step adds character to your Halloween Spider Bread, making it even more fun and festive as it bakes in the oven.
Step 6: Bake
Carefully place the baking sheets in the preheated oven and bake the large spider for 20 to 25 minutes, or until it turns a rich golden brown. The smaller spider legs should bake for approximately 15 to 20 minutes. Keep an eye on the bread during the last few minutes; it’s done when it sounds hollow when tapped on the bottom.
Step 7: Cool Down
Once baked, transfer the Spider Bread to a cooling rack. Allow it to cool for about 20 minutes, which helps maintain its structure. The enticing aroma of your creation will fill the room! Resisting the temptation to slice into it immediately will ensure your bread is at its best for serving.
Step 8: Hollow Out
To create the bowl, carefully cut a lid from the top of the large spider and gently scoop out some of the bread from the center. Be cautious not to remove too much; you want to keep the walls thick enough to hold your favorite dips. Your Halloween Spider Bread is now ready to serve, deliciously accessorized with dips that will delight your guests!

Make Ahead Options
These Spooktacular Halloween Spider Bread Bowls are perfect for meal prep! You can prepare the dough up to 24 hours in advance by mixing it and letting it rise, then shaping into spiders and covering them tightly with plastic wrap. Refrigerating the shaped dough will enhance the flavors and maintain quality; just be sure to let it come to room temperature before baking. When you’re ready to serve, preheat your oven and bake the bread as instructed, adding the coffee beans for eyes just before it goes in the oven. This way, you can free up time on Halloween day while still impressing guests with warm, fresh bread!
What to Serve with Spooktacular Halloween Spider Bread Bowl
Transform your Halloween gathering with delightful pairings that elevate this spooky centerpiece.
-
Creamy Spinach Artichoke Dip: This rich, velvety dip perfectly complements the fluffy bread, creating an irresistible snack that will disappear quickly. Pairing warm, cheesy dips with fresh bread adds an indulgent touch to your Halloween feast.
-
Zesty Salsa: A tangy salsa adds a burst of fresh flavor and spice, breaking through the richness of the bread bowl. Its vibrant colors will also enhance the visual appeal of your spread as the flavors dance on your palate.
-
Cheesy Bean Dip: The cheesy, savory goodness of this dip partners beautifully with the bread’s texture. Each bite is a delicious combination that invites everyone to dive back for more. Serve it warm to keep the flavors rich and comforting!
-
Vegetable Sticks: Crisp, refreshing vegetable sticks provide a great crunch and a pop of freshness against the warm, soft bread. Use colorful assortments like carrots, celery, and bell peppers for eye-catching presentation while balancing the hearty dips.
-
Toasted Bread Pieces: Don’t let the leftover insides go to waste! Toast the removed bread pieces for extra dippable bites that match the spooky theme of your gathering while treating guests to delightful crunchiness.
-
Pumpkin Ale: Complete your festive spread with a seasonal pumpkin ale. The warm spices will enhance the flavors of the dips while adding a fun, holiday touch to your drink options.
-
Chocolaty Spider Cupcakes: Finish off the meal on a sweet note with creepy spider cupcakes. Their spooky yet delightful appearance will surely charm the kiddos and parents alike, wrapping up the gathering with smiles.
How to Store and Freeze Halloween Spider Bread
Fridge: Wrap the bread in plastic wrap or store in an airtight container. It can be kept in the fridge for up to 3 days while maintaining freshness.
Freezer: If you want to freeze your Halloween Spider Bread, wrap it tightly in plastic wrap, then foil. Freeze for up to 3 months. Thaw overnight in the fridge before serving.
Reheating: To restore its warmth and crust, place the bread in a preheated oven at 350°F (175°C) for about 10-15 minutes. This will make your Halloween Spider Bread deliciously soft and inviting again!
Serving Advice: If you plan to use it for dips, assemble and serve the same day for the best flavor and texture.
Halloween Spider Bread: Fun Variations
Feel free to unleash your creativity by experimenting with these fun twists on the classic Halloween Spider Bread!
-
Herb-Infused Dough:
Add dried herbs like rosemary or oregano to the dough for a flavorful kick. Fresh herbs will not only enhance the taste but also give your bread a delightful aroma. -
Cheesy Delight:
Fold in shredded cheese such as cheddar or mozzarella into the dough for a gooey surprise. This cheesy variation will elevate your bread bowl and pair beautifully with dips. -
Spicy Twist:
Incorporate a pinch of cayenne pepper or red pepper flakes to infuse some heat. This will provide a zesty punch and intrigue guests who enjoy a little spice with their treats. -
Sweetened Version:
For a dessert twist, add cinnamon and sugar, shaping the dough into spider bread filled with sweetened cream cheese. Serve with a side of caramel or chocolate sauce for dipping! -
Whole Wheat Option:
Substitute half of the bread flour with whole wheat flour for a heartier, more nutritious bread. This variation is perfect if you’re looking to add some wholesome goodness to your Halloween feast. -
Nutty Crunch:
Toss in some chopped walnuts or pecans. This will not only enhance the texture but also add a lovely nutty flavor that contrasts beautifully with creamy dips. -
Decorative Icing:
Once baked, drizzle a light glaze or icing to create a spooky, sweet look. It’s a fun way to transform your spider bread into a sweeter treat for kids and the young at heart. -
Replacement Ideas:
Experiment with different types of flour, such as gluten-free blends, to cater to various dietary needs. This allows everyone to enjoy a slice of festive fun!
Feel free to pair your Halloween Spider Bread with a delicious spread of dips, and don’t forget to check out options like Cornbread Breakfast Casserole for a delightful addition to your spooky table!
Expert Tips for Halloween Spider Bread
-
Measure Accurately: Use a kitchen scale for precise measurements. This ensures perfect dough consistency and contributes to a successful Halloween Spider Bread.
-
Knead Well: Don’t rush the kneading process. Kneading for about 10 minutes develops gluten, giving your bread a soft, chewy texture.
-
Proof Properly: Allow enough time for the dough to proof until it doubles in size. Rushing this step can result in dense bread instead of a light and airy Halloween Spider Bread.
-
Watch the Oven: Keep an eye on your bread during the last few minutes of baking. It’s done when it sounds hollow when tapped on the bottom.
-
Cool Completely: Let your bread cool for at least 20 minutes before cutting. This maintains the structure, making it easier to hollow out and fill with your favorite dips.

Halloween Spider Bread Recipe FAQs
What type of flour is best for Halloween Spider Bread?
For this recipe, bread flour is ideal as it provides excellent structure and chewiness. If you don’t have bread flour, all-purpose flour can work as a substitute, although it may alter the texture slightly.
How should I store leftover Halloween Spider Bread?
To keep your Halloween Spider Bread fresh, wrap it in plastic wrap or place it in an airtight container. It can be stored in the fridge for up to 3 days. If you’re not planning to finish it within that time, consider freezing it for longer storage.
Can I freeze Halloween Spider Bread?
Absolutely! To freeze your Halloween Spider Bread, wrap it tightly in plastic wrap, then in aluminum foil. You can store it in the freezer for up to 3 months. When you’re ready to enjoy it again, thaw it overnight in the fridge. For the best result, reheat in a preheated oven at 350°F (175°C) for 10-15 minutes to regain that fresh-baked taste.
What if my bread didn’t rise properly?
If your Halloween Spider Bread didn’t rise during proofing, it might be due to expired yeast or insufficient warmth. Always check your yeast’s expiration date and ensure you’re letting your dough rise in a warm, draft-free area. Next time, try proofing it in a slightly warmer place, like an oven turned off but with the light on, to encourage rising.
Is this recipe suitable for a gluten-free diet?
You can modify this recipe for a gluten-free diet by using a gluten-free baking blend designed for yeast breads. Be sure to follow the blend’s specific instructions for best results, as gluten-free flours may require adjustments in hydration and baking time.
Can pets eat Halloween Spider Bread?
While the ingredients in Halloween Spider Bread aren’t toxic to pets, it’s best to avoid giving it to them. The bread contains salt and yeast, which can be harmful in larger amounts. It’s always safer to stick with treats specifically designed for our furry friends!
These FAQs should help you create the perfect Halloween Spider Bread while addressing all your concerns! Enjoy baking!

Halloween Spider Bread: A Spooktacular Party Favorite
Ingredients
Equipment
Method
- In a large mixing bowl, combine the bread flour, warm water, instant yeast, sugar, and salt. Add the beaten egg and mix until a shaggy dough forms. Knead for about 10 minutes until smooth and elastic.
- Divide the dough into a large portion for the spider body and smaller pieces for the legs. Shape the large dough into a round ball and flatten slightly; roll smaller pieces into forms for the legs.
- Place the shaped dough on parchment-lined baking sheets, spray lightly with cooking spray, cover with plastic wrap, and let rise for 30 to 45 minutes until doubled.
- Preheat your oven to 400°F (200°C). Ensure the oven is fully heated for even baking.
- Press coffee beans or peppercorns into the dough for the spider's eyes, positioning them slightly above the body.
- Bake in the preheated oven for 20 to 25 minutes for the main body and 15 to 20 minutes for the legs, until golden brown.
- Transfer to a cooling rack and allow it to cool for about 20 minutes.
- Cut a lid from the top of the large spider and scoop out some bread from the center to create a bowl.

Leave a Reply